
Podcast: Play in new window | Download
Subscribe: RSS
In this week’s Podcast Episode, I talk about some of the different options when it comes to enabling HTTPS for your WordPress website.Below, I will show you the steps for enabling HTTPS in just a few short steps, for free, utilizing Cloudflare.
Cloudflare utilizes SNI for their free SSL plan. For technical details and to decide if this method is right for you, click here for a full breakdown.
How to Enable HTTPS For Free on WordPress
Sign-up for a free Cloudflare account, by clicking the Sign-Up button in the upper right hand corner of the site.
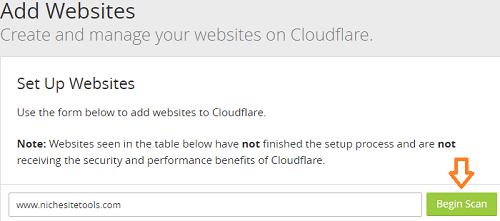
Click the +Add Site button, enter your website URL and click “Begin Scan”.
Once the scan is complete, click “Continue Setup”.

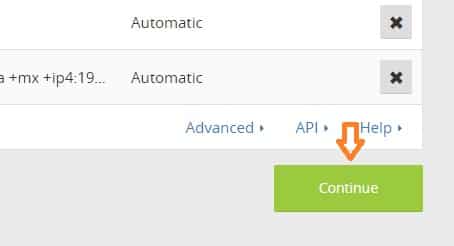
On the DNS verification screen, scroll to the bottom and click “Continue”.
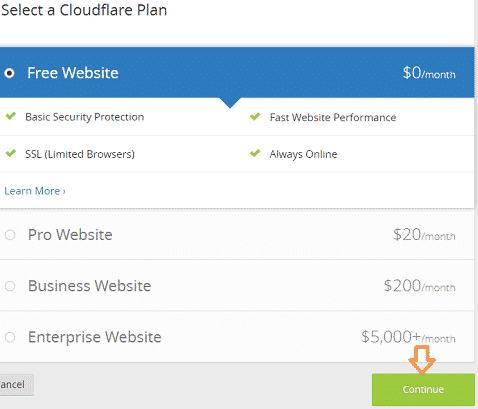
Choose the free plan and click “Continue”.
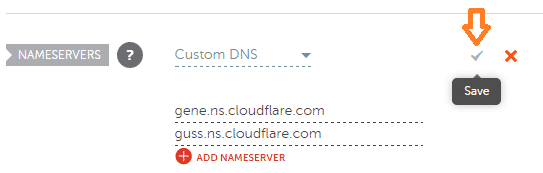
Make note of the Cloudflare DNS servers for the next step.
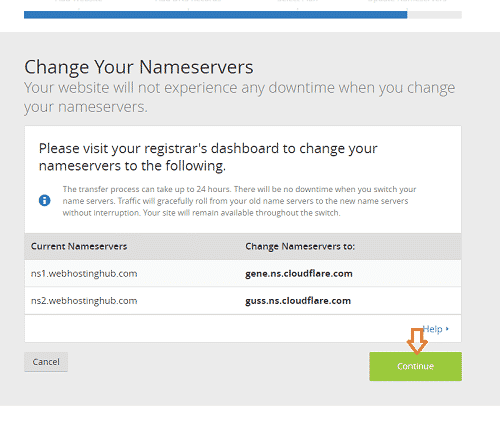
Login to your domain name provider and switch your domain name servers to the ones referenced in the step above.
This is a screenshot showing where to do so if you utilize NameCheap.
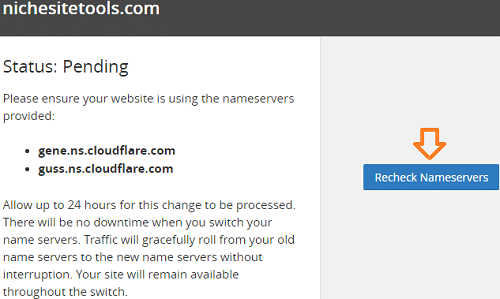
At this point it can take up to 24 hours for the changes to take effect, so give it a bit of time. Usually 1-2 hours is fine.
Return to your Cloudflare dashboard and click “Recheck Nameservers”.
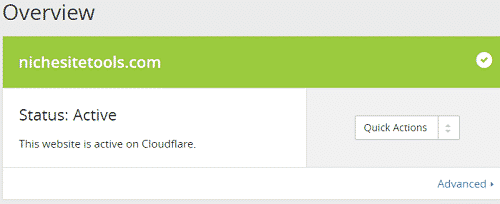
Once that is successful, you will see the following screenshot showing that your status is now active.
Login to your WordPress dashboard and install the Cloudflare Flexible SSL plugin.
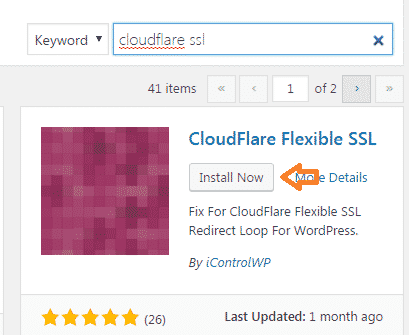
Click activate.

You should now be able to access your site by typing your URL into your browser with https at the beginning. Test it and make sure it works.
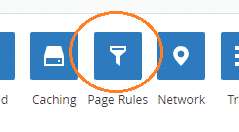
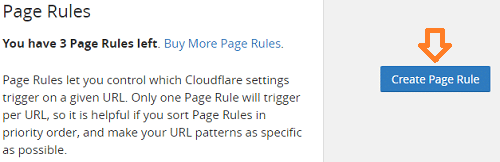
Assuming all is good, go to your Cloudflare account and click on “Page Rules”.
Click on “Create Page Rule”.
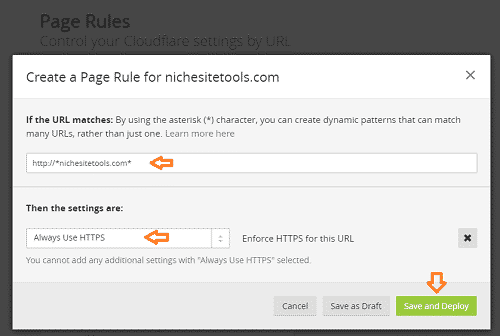
Type in your URL as http://*yoursite.com*, click “Add a Setting” and choose “Always Use HTTPS” from the pull-down menu and click “Save and Deploy”.
Navigate to your website with the regular http URL and it should automatically redirect to the https version for all of your content.
Congratulations! That wasn’t so bad right?
Quick Note: If you try your site in Internet Explorer and get a message that some of your content is insecure, it is likely an outdated plugin causing the issue. Either disable the outdated plugin or install this one additional plugin and that should fix the issue: Really Simple SSL.
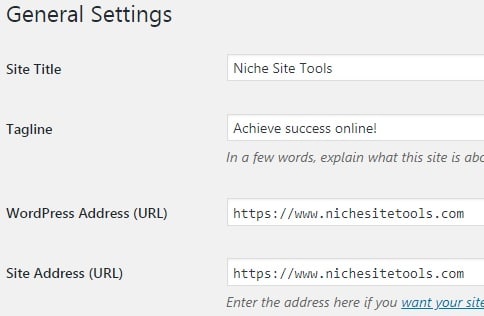
Change Your URL to https in WordPress Dashboard
Go to your WordPress dashboard -> Settings -> General and change your URL to https from http
Add HTTPS URL To Google Search Console and Analytics
Now that your content is properly displaying via HTTPS, you will need to add the new version of your URL to Google Search Console and Google Analytics.
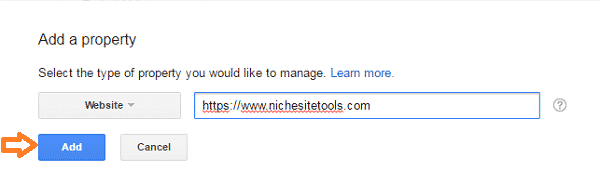
Login to Google Search Console and click on “Add a Property” and input the https version of your site.
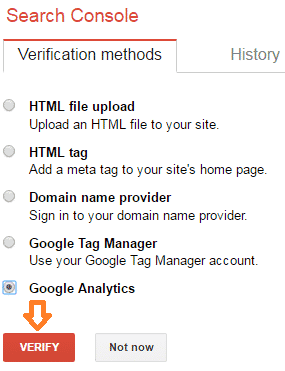
Choose one of the verification methods provided and click “Verify”.
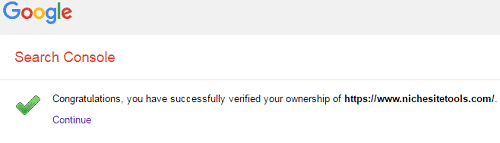
You should then receive a message saying your site is verified.
Congrats, only one step to go!
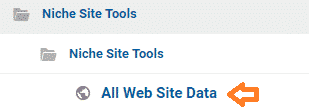
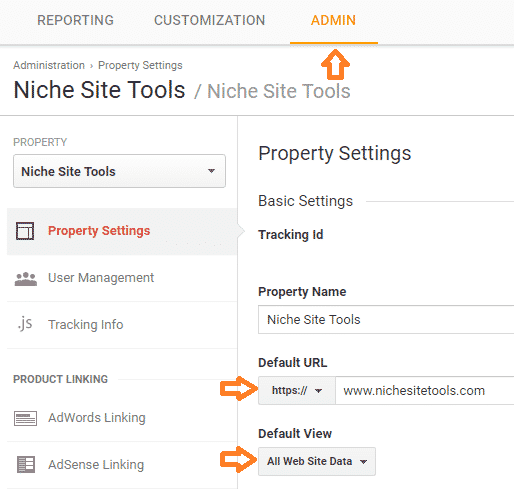
Login to your Google Analytics account and choose the relevant website and click “All Website Data”.
Click “Admin” across the top, click on “Property Settings” and choose “https” from the “Default URL” pulldown menu.
For the “Default View” box choose “All Web Site Data” and be sure to scroll down and click “Save” at the bottom.
That’s it! You are now done, great job!
Backout Steps
In the event you would like to switch back from https to http for any reason, all you have to do is disable the Cloudflare Flexible SSL plugin in your WordPress dashboard and login to your Cloudflare account and remove the Page Rule you added above.
After that, remove the https version of your website from your Google Search Console account and switch your Google Analytics account back to http, from https.
Conclusion
In the Podcast I talked about why you would want to enable https, with the main reason being that it is now a ranking factor in Google’s algorithm.
Here are some details, directly from Google, with the specifics…
“Will this migration affect my ranking?
As with all migrations, you may experience some ranking fluctuation during a migration. However, you should also review the best practices information for HTTPS pages to avoid HTTPS-specific pitfalls.
HTTPS sites receive a small ranking boost, but don’t expect a visible change. Google uses HTTPS as a positive ranking signal.
This signal is one amongst many others, and currently carries less weight than high-quality site content; you should not expect a major SEO advantage for moving to HTTPS in the short term.
In the longer term, Google may increase the strength of the HTTPS boost.”
Source: Google
I know lots of folks were interested in how to switch to HTTPS, so I really hope this post/Podcast episode provided the info you needed.
In the next Podcast Episode, I will be talking about how to increase your site speed and performance, utilizing some additional features available with Cloudflare.
Be sure to subscribe to the Podcast via iTunes or your favorite Podcast player and jump on my email list to get notified any time new Episodes come out.
Thanks for being a valued member of the community!